Symbiosis uses the backup2l software to handle backups. backup2l is a lightweight command line tool for generating, maintaining and restoring backups on a hard disk. Backups are created autonomously by a cron script. It features differential backups at multiple hierarchical levels and provides rollback functionality. backup2l uses filename, modification time, size, ownership and permissions to decide if a file is new or modified.
Making changes to the configuration
In Symbiosis the backup2l configuration is generated from snippets in the /etc/symbiosis/backup.d./conf.d/ directory.
If you need to make changes, modify files inside the /etc/symbiosis/backup.d/conf.d directory then run sudo make to update the configuration file.
Pre backup scripts (Symbiosis)
A number of scripts are executed before and after the backup is performed. Scripts located in this directory are executed before backup2l: /etc/symbiosis/backup.d/pre-backup.d/ .
Inside the /pre-backup.d/ folder there are the following scripts:
- 00-download-backup: Downloads any files stored within the remote backup space, previously produced by backup2l, to local storage /var/backups/localhost/ . This ensures that no local backups are lost if the machine is re-image, or local backups removed due to user error.
- 04-disable-lock: Disables the backup2l lock file
- 05-check-availspace: Checks if there is enough free space on the local computer for a backup.
- 06-enable-lock: Created a backup2l lock file.
- 10-dump-mysql: Dumps all the MySQL databases to local disk.
- 20-dump-postgres: Dumps all the postgresql databases to the local disk.
- 30-clear-orphans: Cleans up files.
Post backup scripts (Symbiosis)
Scripts located in this directory are executed after backup2l: /etc/symbiosis/backup.d/post-backups.d/ .
- 99-upload-backup: This script works out the name of the remote backup space and uploads the local backup2l archives.
You can run individual scripts. For example, if all local backups were lost (server rebuild) you would run ./00-download-backup from the command line when inside the /etc/symbiosis/backup.d/pre-backup.d/ directory.
Help
Use the command backup2l -h or backup2l –help to view the help.
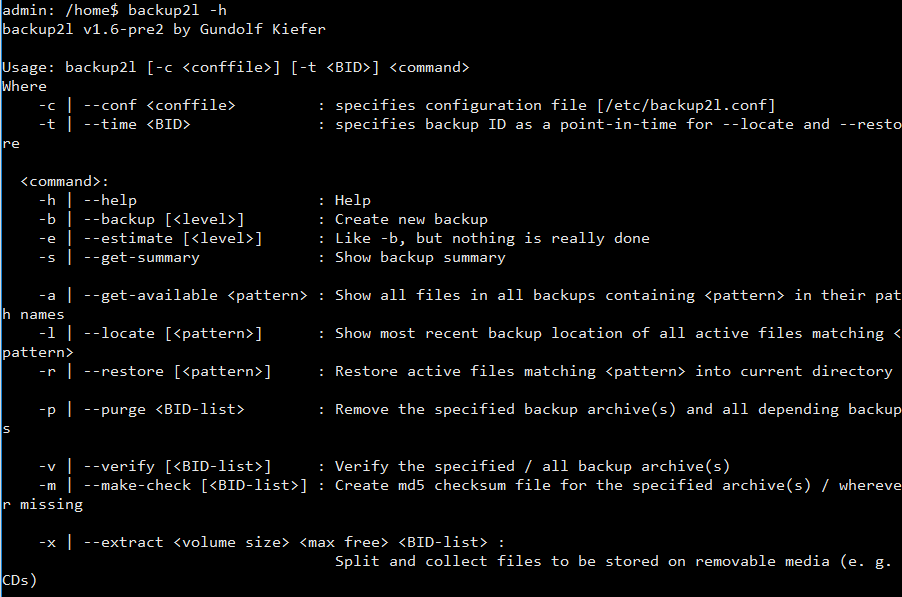
backup2l option reference:
- -c or –conf <conffile> : This argument specifies configuration file. The default location is /etc/backup2l.conf . Symbiosis stores the configuration file in /etc/symbiosis/backup.d .
- -t or –time <BID> : If present, this option selects a certain backup for the –locate and –restore commands. The –restore command will restore files and directories exactly as they were at the time the backup was taken. The default is the latest available backup.
backup2l command reference:
- -h or –help : Display the help screen
- -b or –backup [<level>] : Create new backup
- -e or –estimate [<level>] : Like -b, but nothing is really done
- -s or –get-summary : Show backup summary
- -a or –get-available <pattern> : Show all files in all backups containing <pattern> in their path names
- -l or –locate [<pattern>] : Show most recent backup location of all active files matching <pattern>
- -r or –restore [<pattern>] : Restore active files matching <pattern> into current directory
- -p or –purge <BID-list> : Remove the specified backup archive(s) and all depending backups
- -v or –verify [<BID-list>] : Verify the specified / all backup archive(s)
- -m or –make-check [<BID-list>] : Create md5 checksum file for the specified archive(s) / wherever missing
- -x or –extract <volume size> <max free> <BID-list> : Split and collect files to be stored on removable media (e. g. CDs)
Listing backup summary
Run sudo backup2l -s or sudo backup2l –get-summary to get a backup summary.
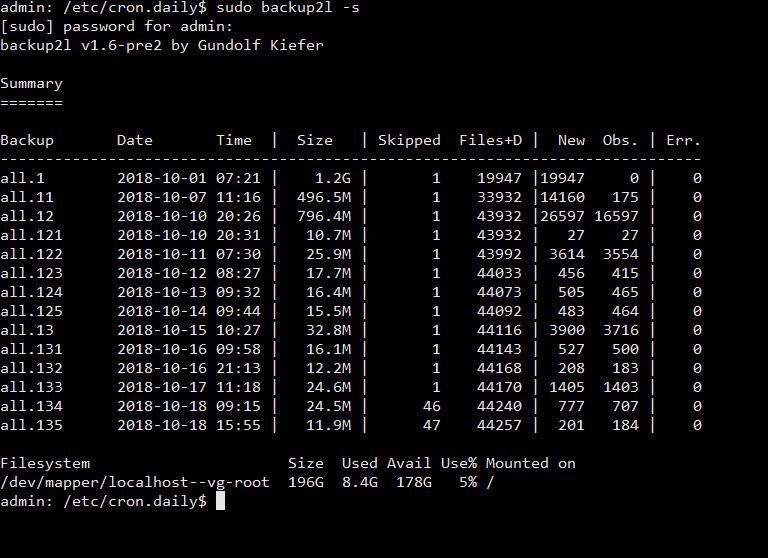
This command shows a table detailing each backup and the file system usage of the backup device. The summary table is useful if you need to reduce the size of backups stored locally. It’s easy to see which levels of backups can be deleted.
Backup estimate
The command sudo backup2l -e or sudo backup2l –estimate prints the number of files, estimated amount of data and other information about the backup that would be created if the -b command is subsequently used. No backup archives are created or remove.

List or locate backup contents
You can list the contents of the most recent backup using sudo backup2l -l or sudo backup2l –locate . If one or more patterns are supplied, grep is used to filter the list. All messages go to the stderr so that the generated file list can be easily redirected, to file, for example.
List files that match the pattern “cron.hourly”: sudo backup2l -l cron.hourly
List files that match the pattern “cron.hourly” and write results to disk: sudo backup2l -l cron.hourly > output.txt
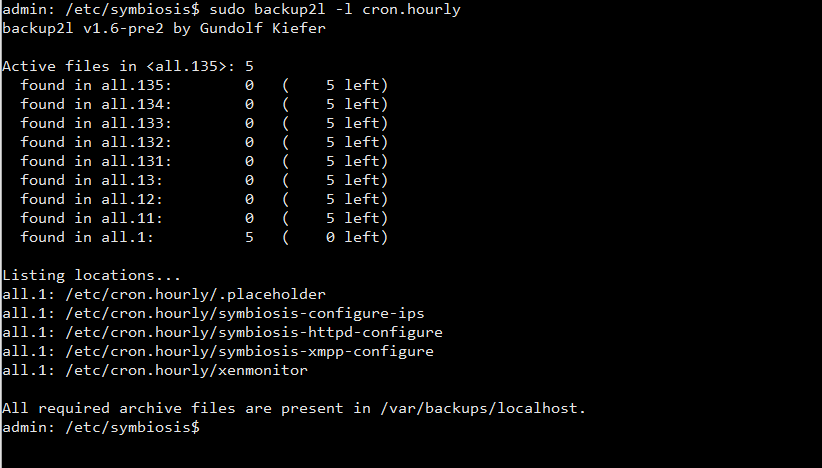
The list of files is either from the latest backup or the one specified by the –time flag. Files that were removed at that time but are still stored in a later archive will not be shown. Use the time option in conjunction with the –locate flag like this: sudo backup2l –time 124 -l cron.hourly .
Get available files for all backups
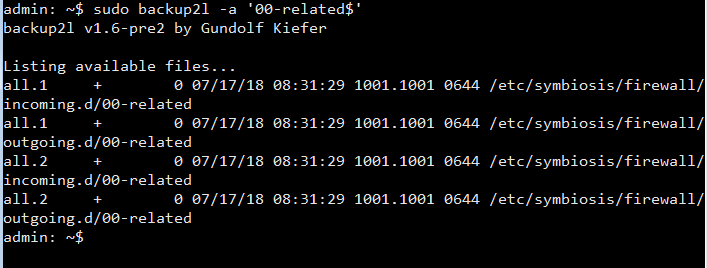
The -a or –get-available flag shows all files removed and added for all backups. A + in the output indicates that the file is new and contained in the archive file. A – indicates that the file has been removed or replaced. As with –locate patterns can be supplied, filtered by grep. The search pattern is applied to filenames and other attributes, not just filenames. Without a search pattern the command will list all files in the archive. To show all available versions of a particular file, for example, /etc/symbiosis/firewall/outgoing.d/00-related and /etc/symbiosis/firewall/incoming.d/00-related run the command: sudo backup2l -a ’00-related’ . You can use a $ at the end of the filename to get an exact match. The $ anchor in grep matches the end of a line.
Remove backup archives
In some situations, such as low disk space, you can reduce the size of the local backups. The -p or –purge command removes the specified backup archive.
Run sudo backup2l –get-summary to get a summary of the current backups.
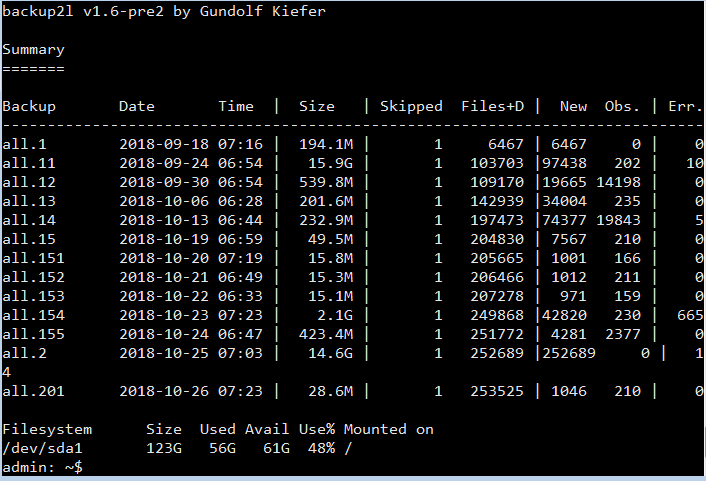
To remove the third level backups all.151 to all.155 run the command sudo backup2l -p 151 . This will then instruct backup2l to remove all.151 and all its dependent backups.

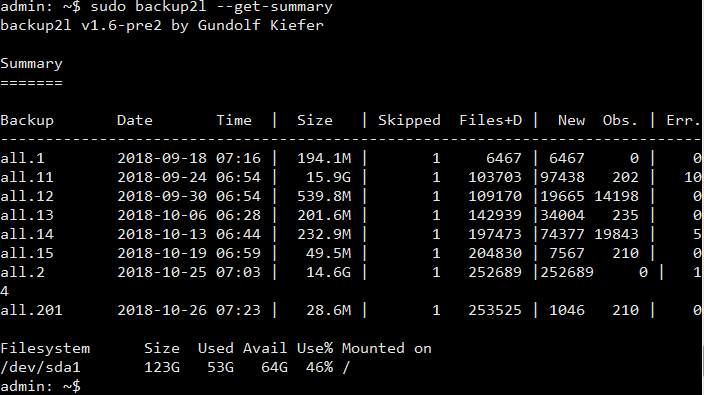
Running sudo backup2l –get-summary confirms the removal of all.151 and all dependent backups.
If Symbiosis is configured to upload archives to a remote backup space, you must force the post backup job 99-upload-backup to make sure deletions are synchronised with the offsite backup space.
sudo /etc/symbiosis/backup.d/post-backup.d/99-upload-backup
Locate and restore files
The -r or –restore command performs the same steps like –locate and then restores the respective files. All files are restored relative to the current directory. They can be restored to their original location by changing directory into / (root) before.
Suppose we want the restore the files /etc/symbiosis/firewall/outgoing.d/00-related and /etc/symbiosis/firewall/incoming.d/00-related .
First use the -l switch to locate the most recent backup of these files using sudo backup2l -l ’00-related’ .
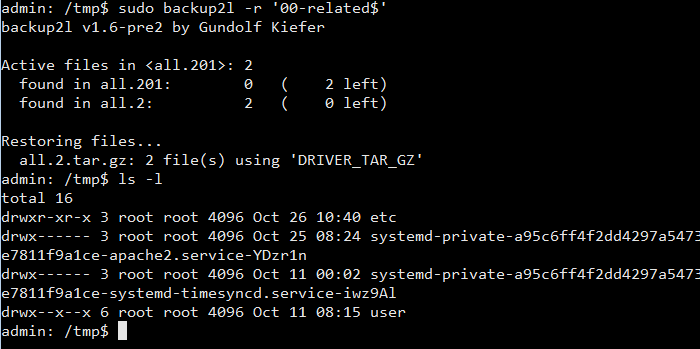
To recover the most recent version of these files to your current directory (it is not recommended to run this command in the root / directory because any existing files with get overwritten, restore to a temporary folder first), simply run sudo backup2l -r ’00-related$’ . Remember the $ is there for an exact match. The recovery process can take a few minutes to complete.
Locate and restore files from earlier backups
If you want to recover from an earlier backup use the -a switch to show all available versions of the file. For example, suppose you need a version of /etc/passwd from 16th August 2018. Run the command sudo backup2l -a ‘/etc/passwd$’ to get a list of all available versions.

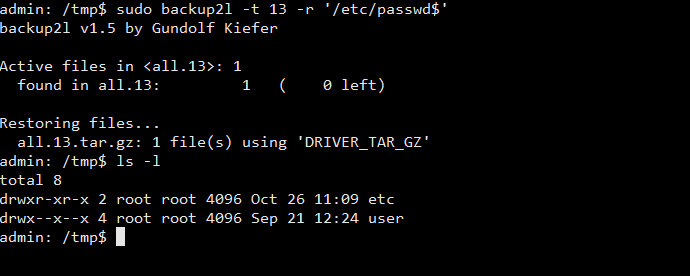
To recover a copy of /etc/passwd dated 16 August 2018, you need to reference backup number 13. To recover this file simply run sudo backup2l -t 13 -r ‘/etc/passwd$’ . Remember to do this inside a temporary folder.
Verify a backup archive
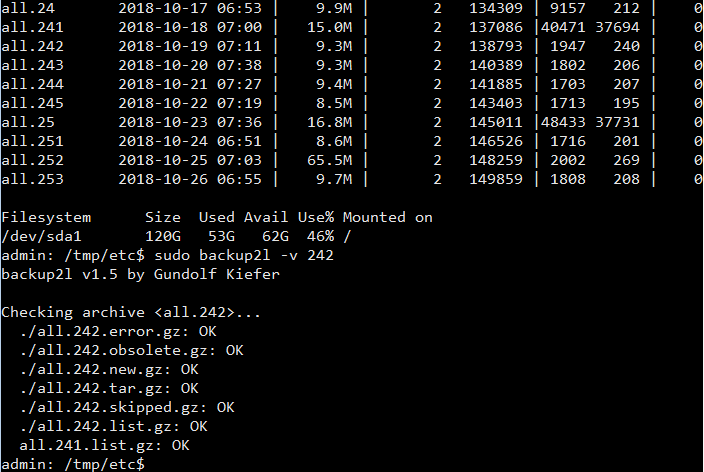
The -v or –verify command verifies the specified backup archive. If no backup ID (BID) is specified, all existing archives are checked. To verify BID all.242 run the command sudo backup2l -v 242 .
